
Setting up your WordPress navigation menus is one of the first things to do after launching a website. A clear, well-structured menu helps users find your content and improves overall site navigation.
In this guide, we’ll show you step-by-step how to create, customize, and manage your menus using the WordPress dashboard. You don’t need any coding skills—just follow the process and your navigation will be up and running in minutes.
What Are WordPress Navigation Menus?
WordPress navigation menus are customizable links you can add to your website’s header, footer, or sidebar. These links help visitors move around your site and access important pages like Home, Blog, Contact, or custom links.
You can manage your menus under the Appearance > Menus section in the dashboard.
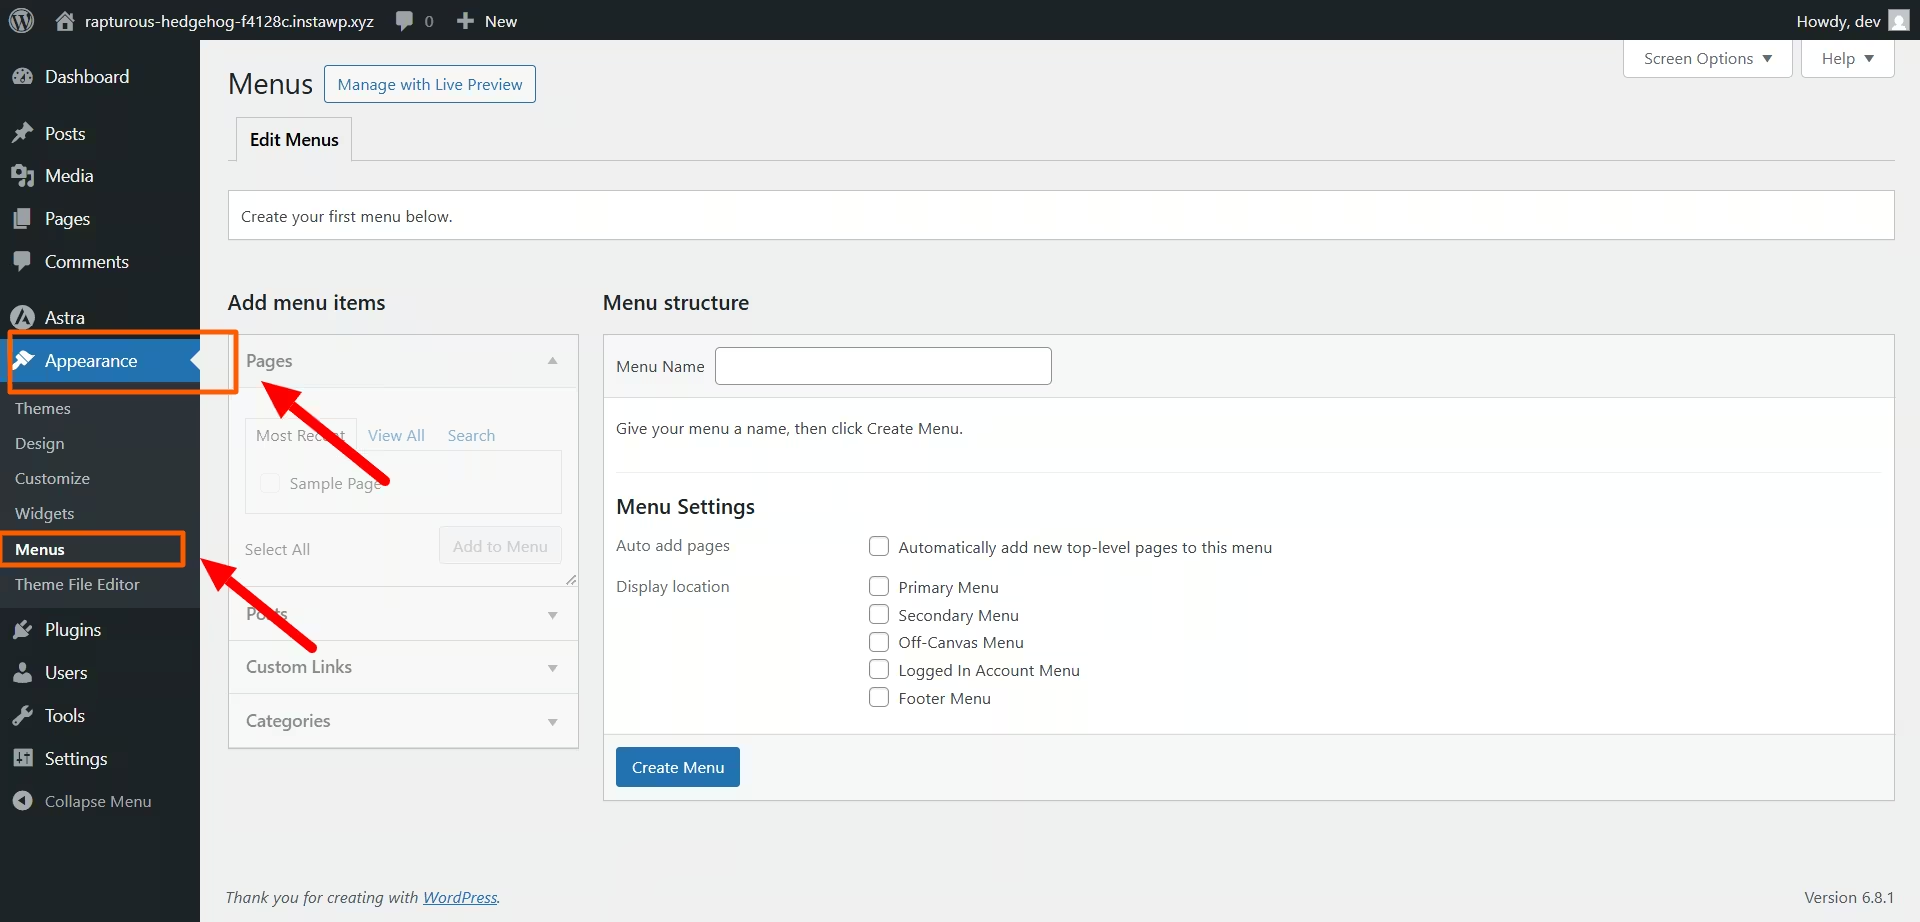
How to Create a New Menu in WordPress
- Go to your WordPress Dashboard.
- Navigate to Appearance > Menus.
- Click Create a new menu.
- Give your menu a name (e.g. “Main Menu”).
- Click Create Menu.
Once created, you can begin adding pages, posts, or custom links to it.
Want to customize your WordPress dashboard first? Check our guide on how to change your site title and logo in WordPress.
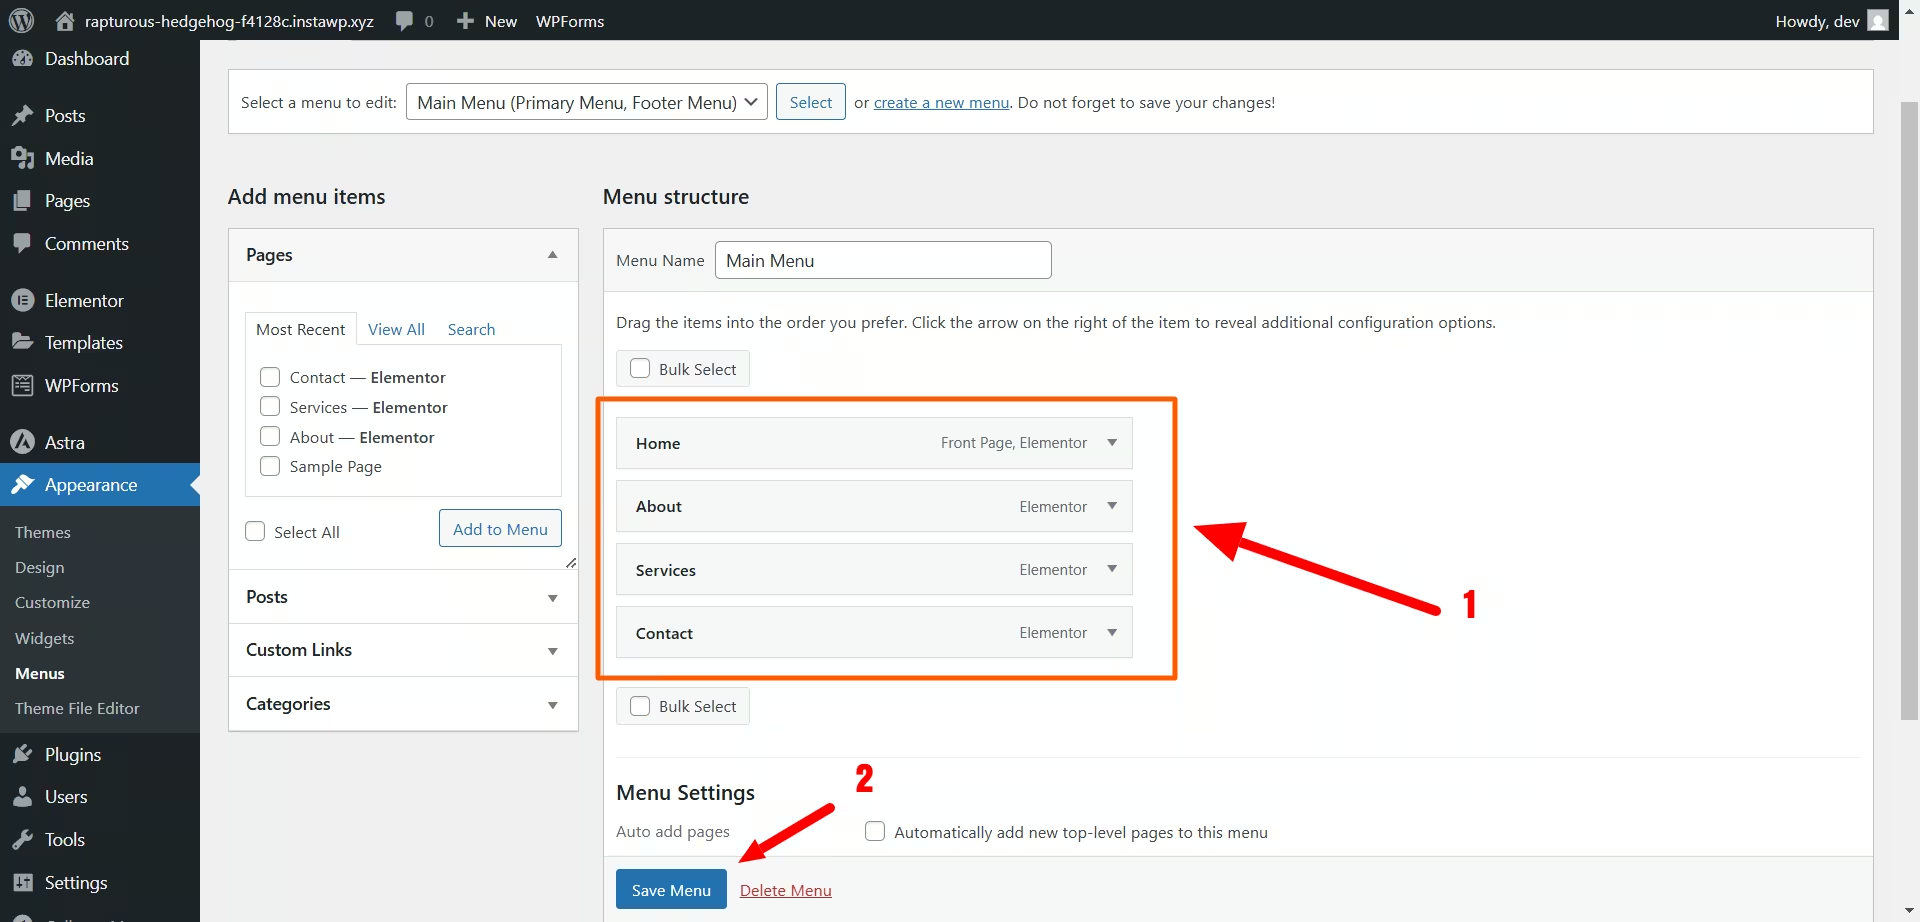
Adding Items to Your Menu
- In the Add menu items section, select pages, posts, or categories.
- Click Add to Menu.
- Drag and drop the items to reorder or create dropdowns.
You can also add custom links if you want to point to an external site (like WordPress.org) or a specific internal page.
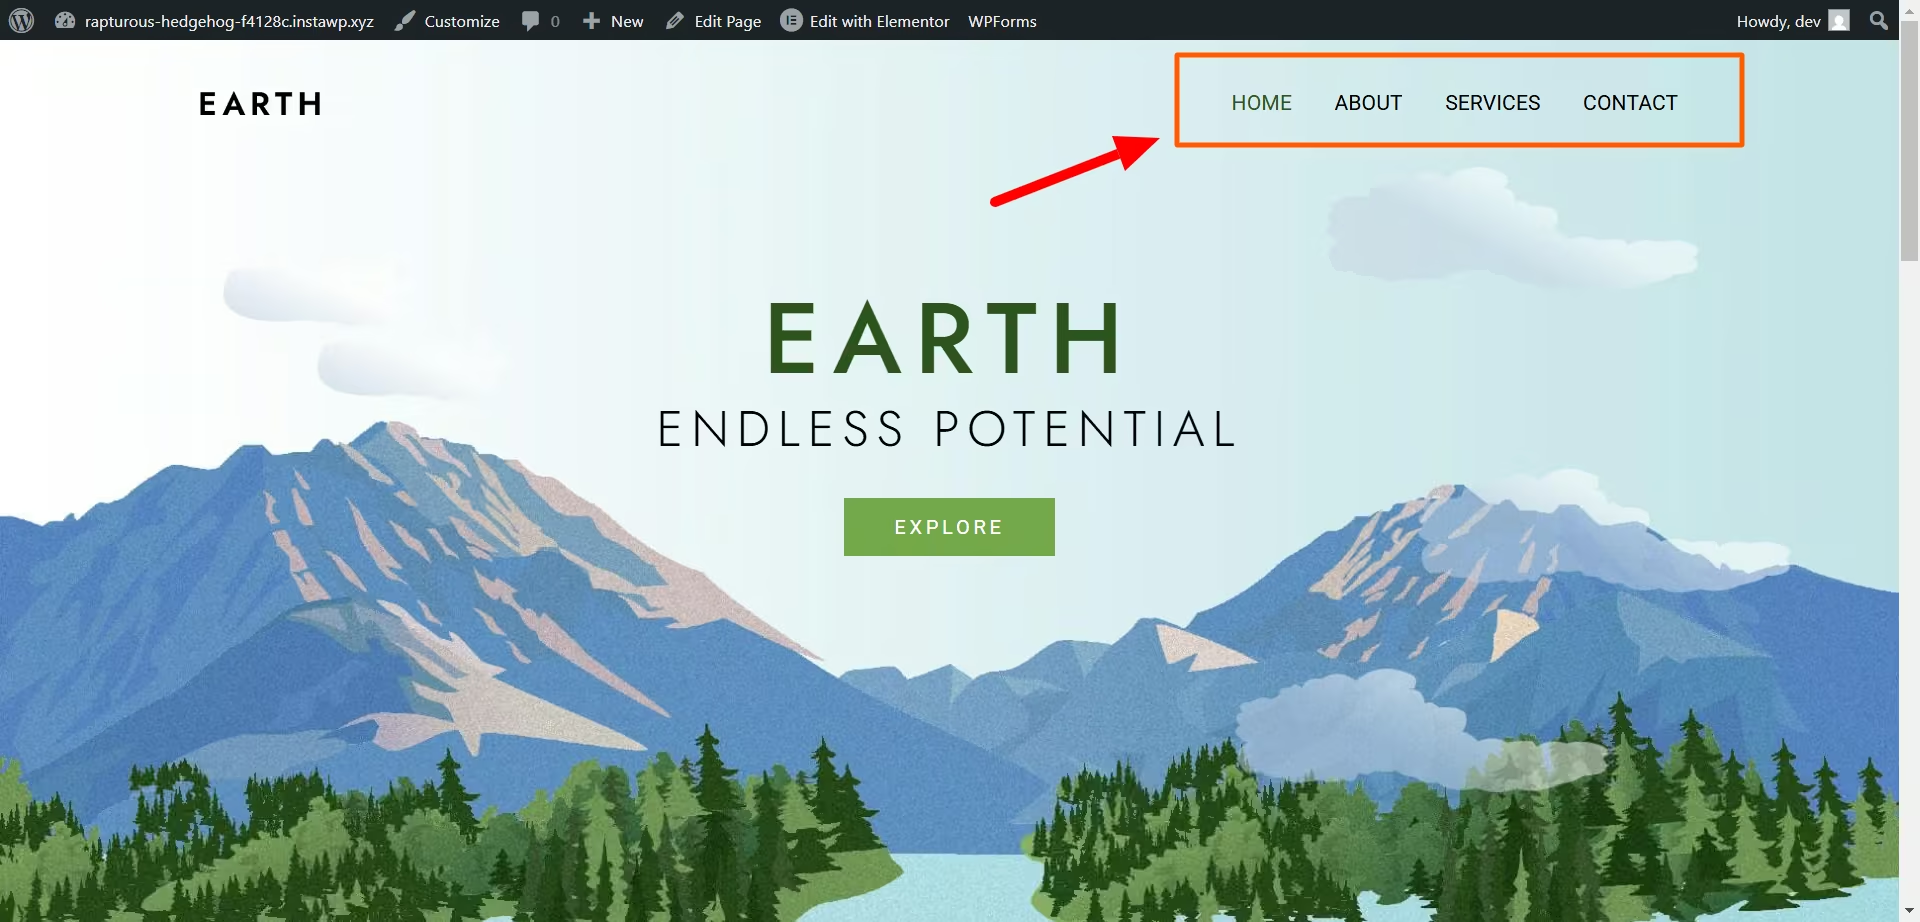
Assigning Menu Locations
WordPress themes come with multiple menu locations, such as:
- Primary Menu (header)
- Footer Menu
- Mobile Menu
In the Menu Settings, check the box for the location you want the menu to appear. Save changes.
Need help selecting a theme with flexible menus? Browse themes on WordPress Theme Directory.
Editing and Managing WordPress Navigation Menus
To edit your menu anytime:
- Go to Appearance > Menus.
- Select the menu from the dropdown.
- Add, remove, or reorder items.
- Click Save Menu when done.
You can even manage menus from the Customizer (Appearance > Customize > Menus), which gives a live preview of your changes.
Tips for Better Navigation
- Keep your menus short (5–7 items max)
- Use clear names like “About” instead of “Who We Are”
- Link to your most important pages
- Use dropdowns for grouped content (like Services)
Good navigation improves both user experience and SEO. A clear menu structure helps search engines crawl your site more efficiently.
Want to optimize content too? Check out our article on how to edit posts and pages in WordPress.
Final Thoughts
Learning to create and manage your WordPress navigation menus is simple—and powerful. With just a few clicks, you can organize your site in a way that’s helpful for both visitors and search engines.
Use this guide anytime you need to add new links or improve your site’s structure. A clean, easy-to-use menu is key to a user-friendly WordPress site.