

Adding products to your WooCommerce store is one of the first things you’ll do when setting up your online shop. In this beginner-friendly guide, we’ll show you how to add a new product in WooCommerce—both simple products and variable products.
This tutorial uses plain language and step-by-step instructions. Whether you’re selling a single item or a product with size and color options, this guide covers it all.
What Is a Product in WooCommerce?
A product in WooCommerce is any item you want to sell. WooCommerce supports different product types, but the most common are:
- Simple Product – A basic item with no variations (e.g., a book).
- Variable Product – An item with different options (e.g., a t-shirt with sizes and colors).
Step 1: Log In to WordPress and Access WooCommerce
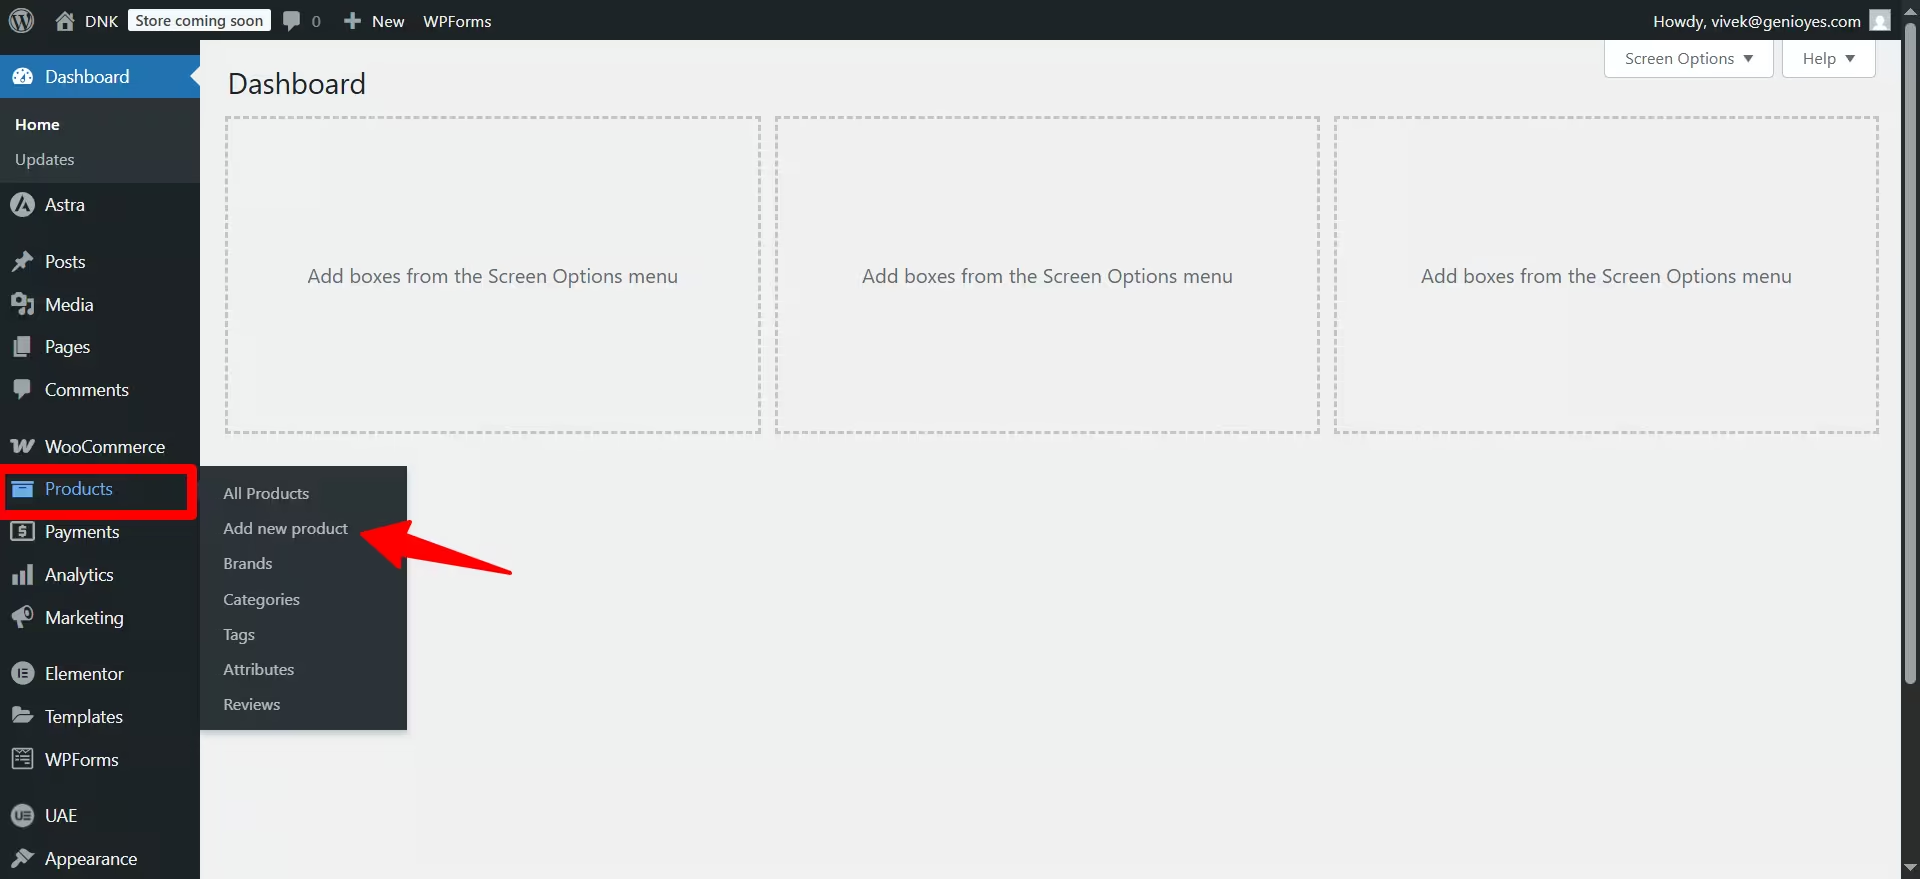
- Go to your WordPress dashboard.
- On the left-hand menu, hover over Products.
- Click Add New.
This will take you to the product editor, where you’ll add all the details about your product.
Step 2: Add Product Title and Description
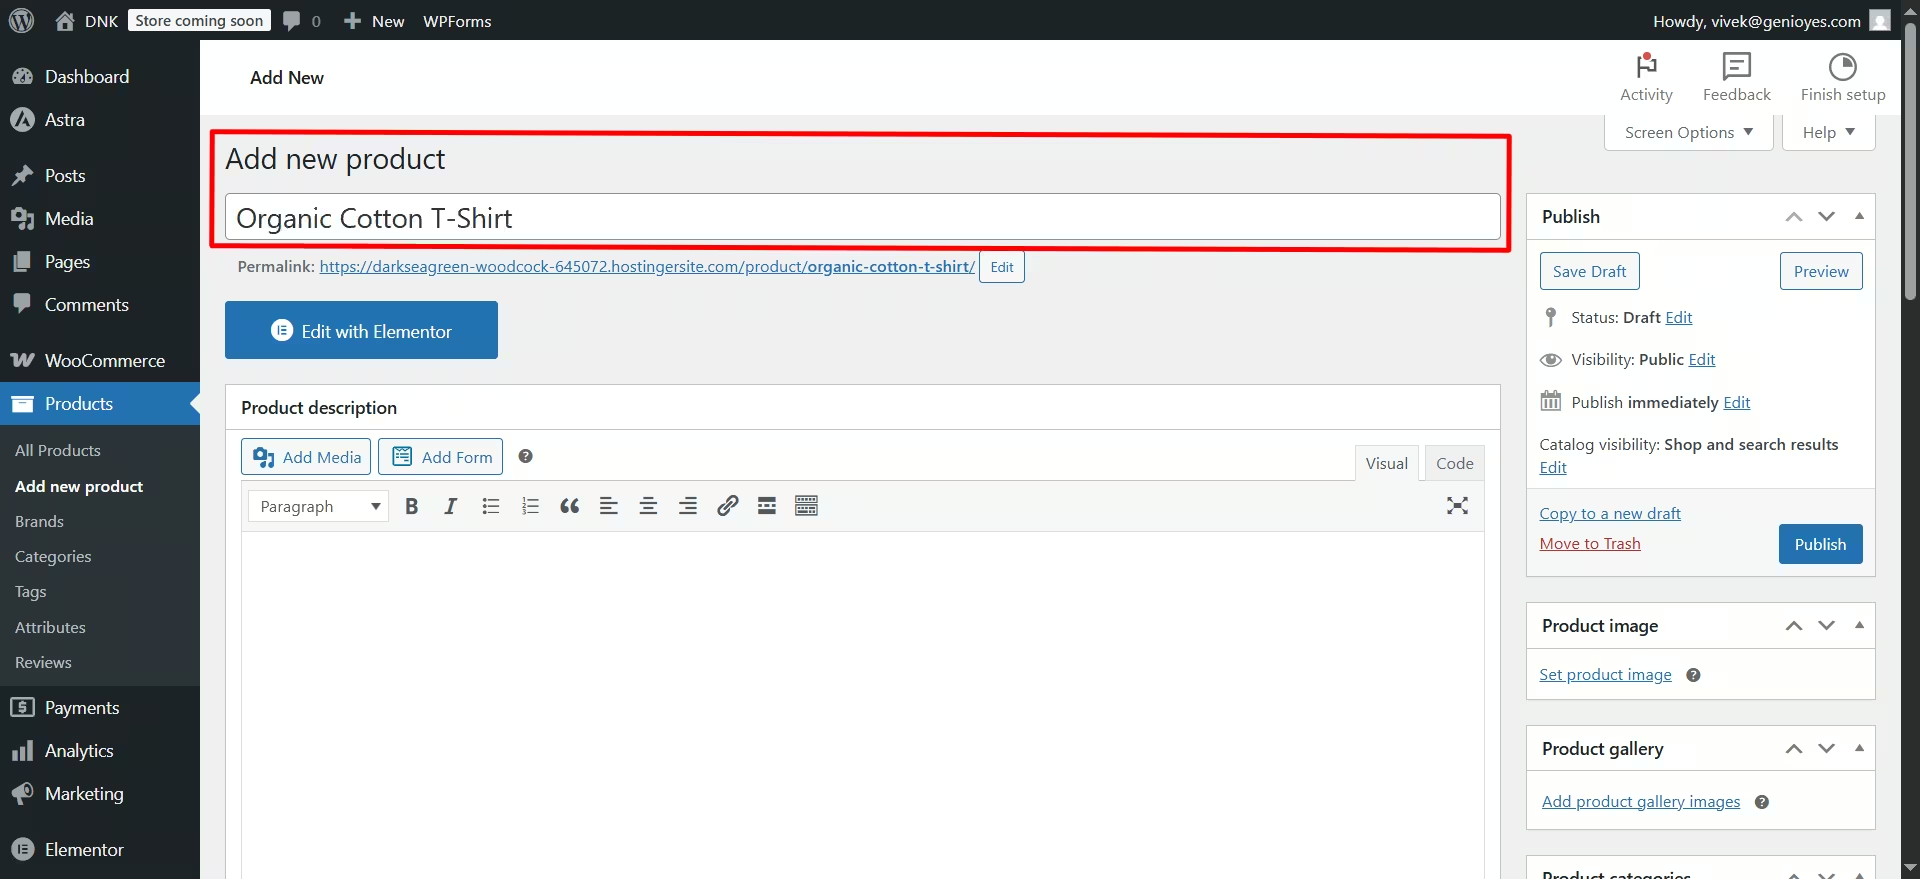
Product Title
At the top, enter your product name. This is what shoppers will see on your product page.
Example: Organic Cotton T-Shirt
Product Description
In the large editor box below the title, write a detailed description of the product. Include:
- Features
- Benefits
- Sizing
- Materials
This description appears on the product page under the Description tab.
Step 3: Choose Product Type
Scroll down to the Product data section.
From the dropdown, choose your product type:
- Simple product – for single items
- Variable product – for items with options like size or color
We’ll explain both below.
Step 4: Add a Simple Product in WooCommerce

1. Choose “Simple product”
This is selected by default.
2. Set the Price
Under the General tab:
- Regular price – the main price
- Sale price – optional discounted price
3. Inventory
Under the Inventory tab:
- SKU (optional) – your product’s stock keeping unit
- Stock status – choose “In stock” if available
- Enable stock management if needed
4. Shipping
Enter weight and dimensions under the Shipping tab if needed.
5. Product Image
In the right-hand panel:
- Click Set product image
- Upload or choose a photo from your Media Library
This is the main image that shoppers will see.
6. Product Categories and Tags
- Assign the product to a category
- Add tags like “cotton,” “eco-friendly,” or “unisex”
7. Short Description
Above the Product Data section, you’ll see a Short Description box. This appears next to the product image. Keep it brief and clear.
Example: “Soft, breathable organic cotton t-shirt available in multiple sizes.”
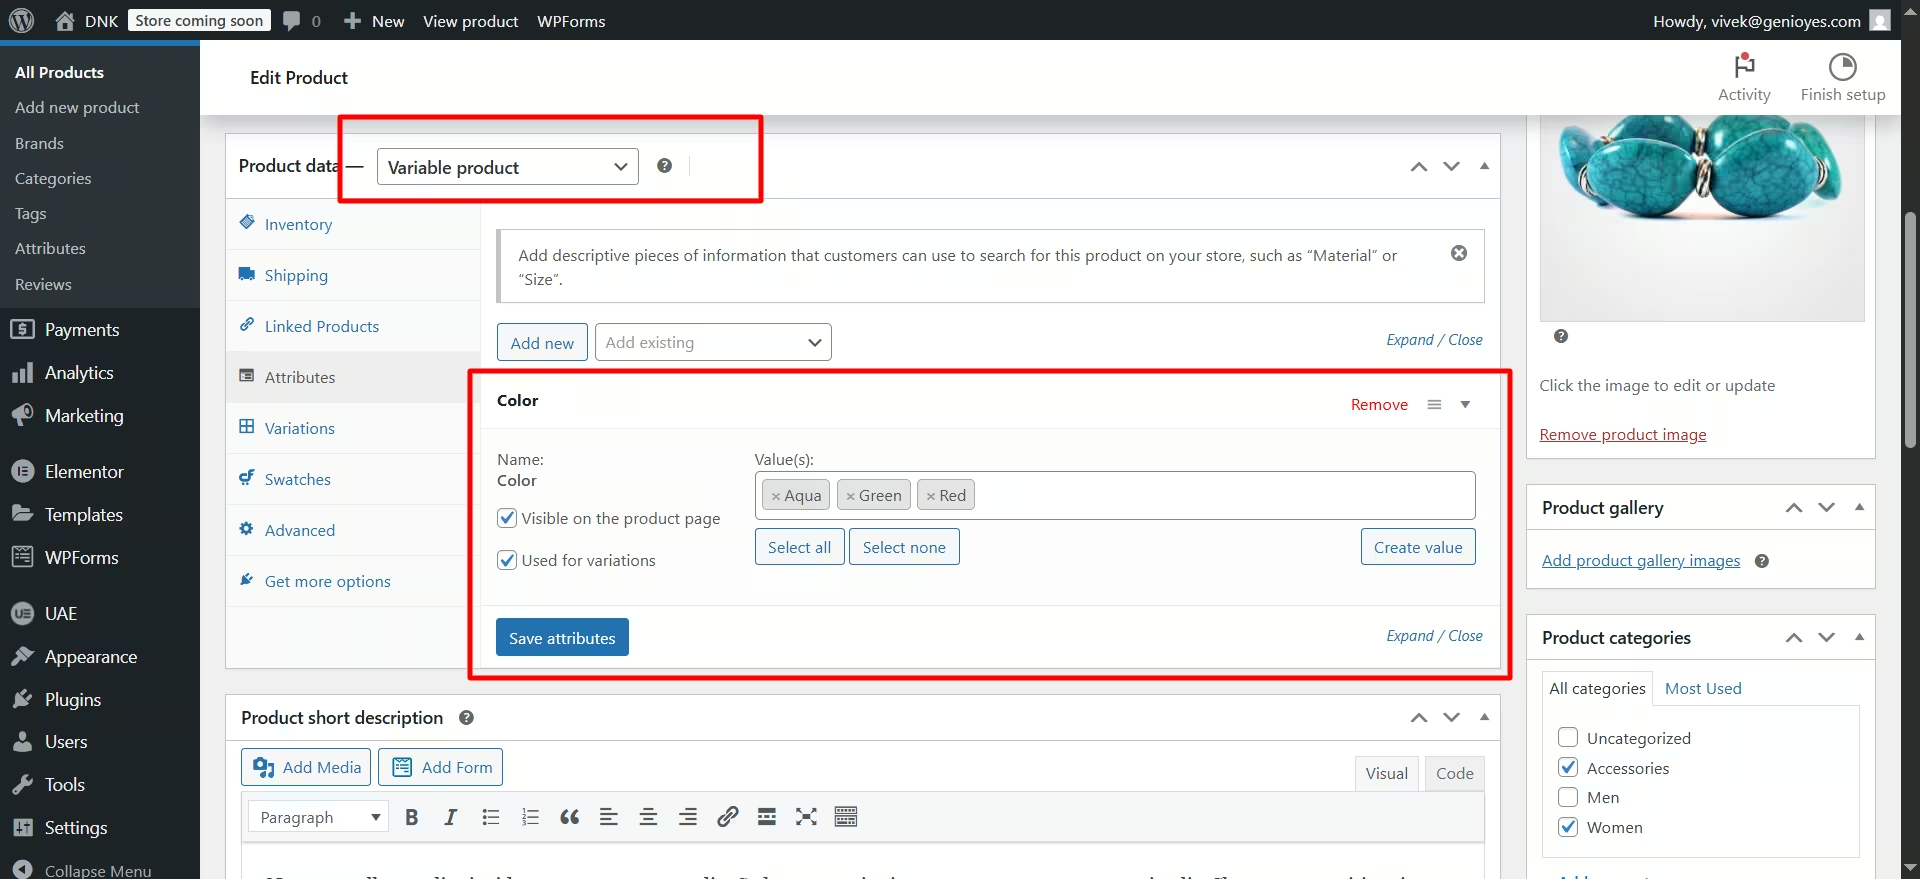
Step 5: Add a Variable Product in WooCommerce
If your product comes in different versions—like size or color—you’ll use a variable product.
1. Select “Variable product”
Change the product type from Simple to Variable in the Product data dropdown.
2. Add Attributes
Go to the Attributes tab:
- Click Add and choose “Custom product attribute”.
- Name it, like
SizeorColor. - Enter values separated by
|, like:
Small | Medium | Large - Check both boxes:
☑️ Visible on the product page
☑️ Used for variations - Click Save attributes
Repeat if you have more than one attribute.
3. Create Variations
Now go to the Variations tab:
- Click Add variation > Create variations from all attributes
- Click Go
- WooCommerce will auto-generate all possible combinations (e.g., Small – Red, Medium – Blue, etc.)
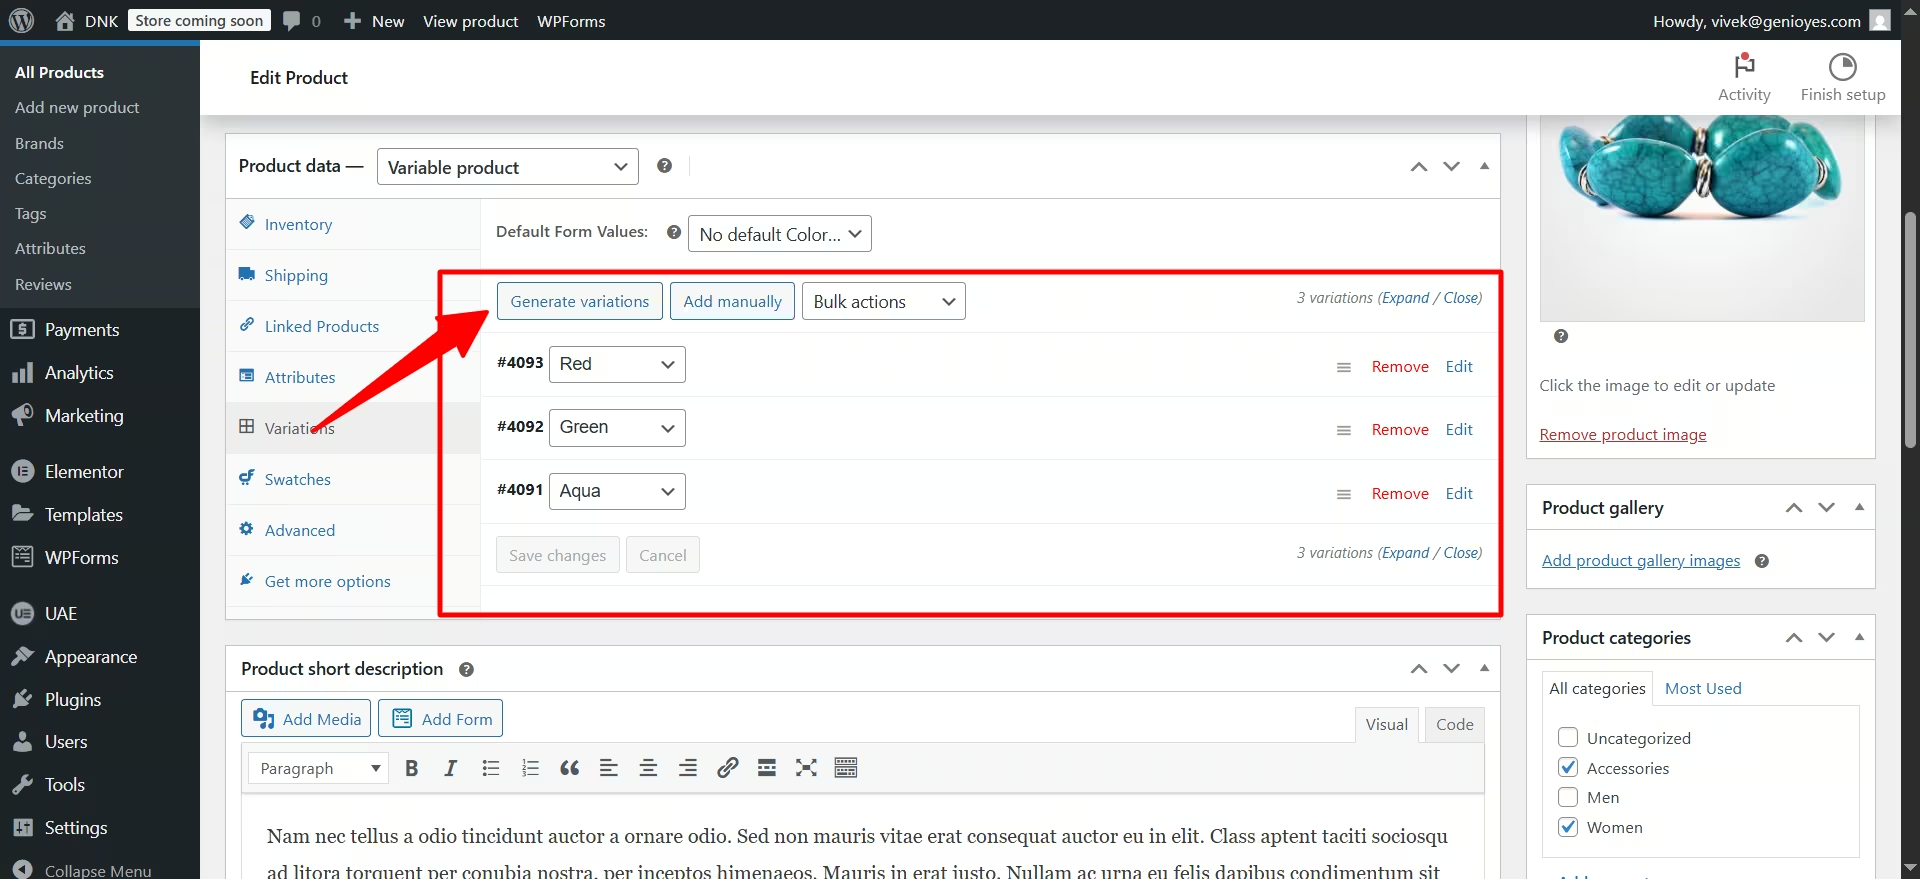
4. Set Price and Images for Each Variation
For each variation:
- Click the arrow to expand
- Add price
- Add image (optional but helpful)
- Set stock status
Make sure to save changes.
Step 6: Add Product Images
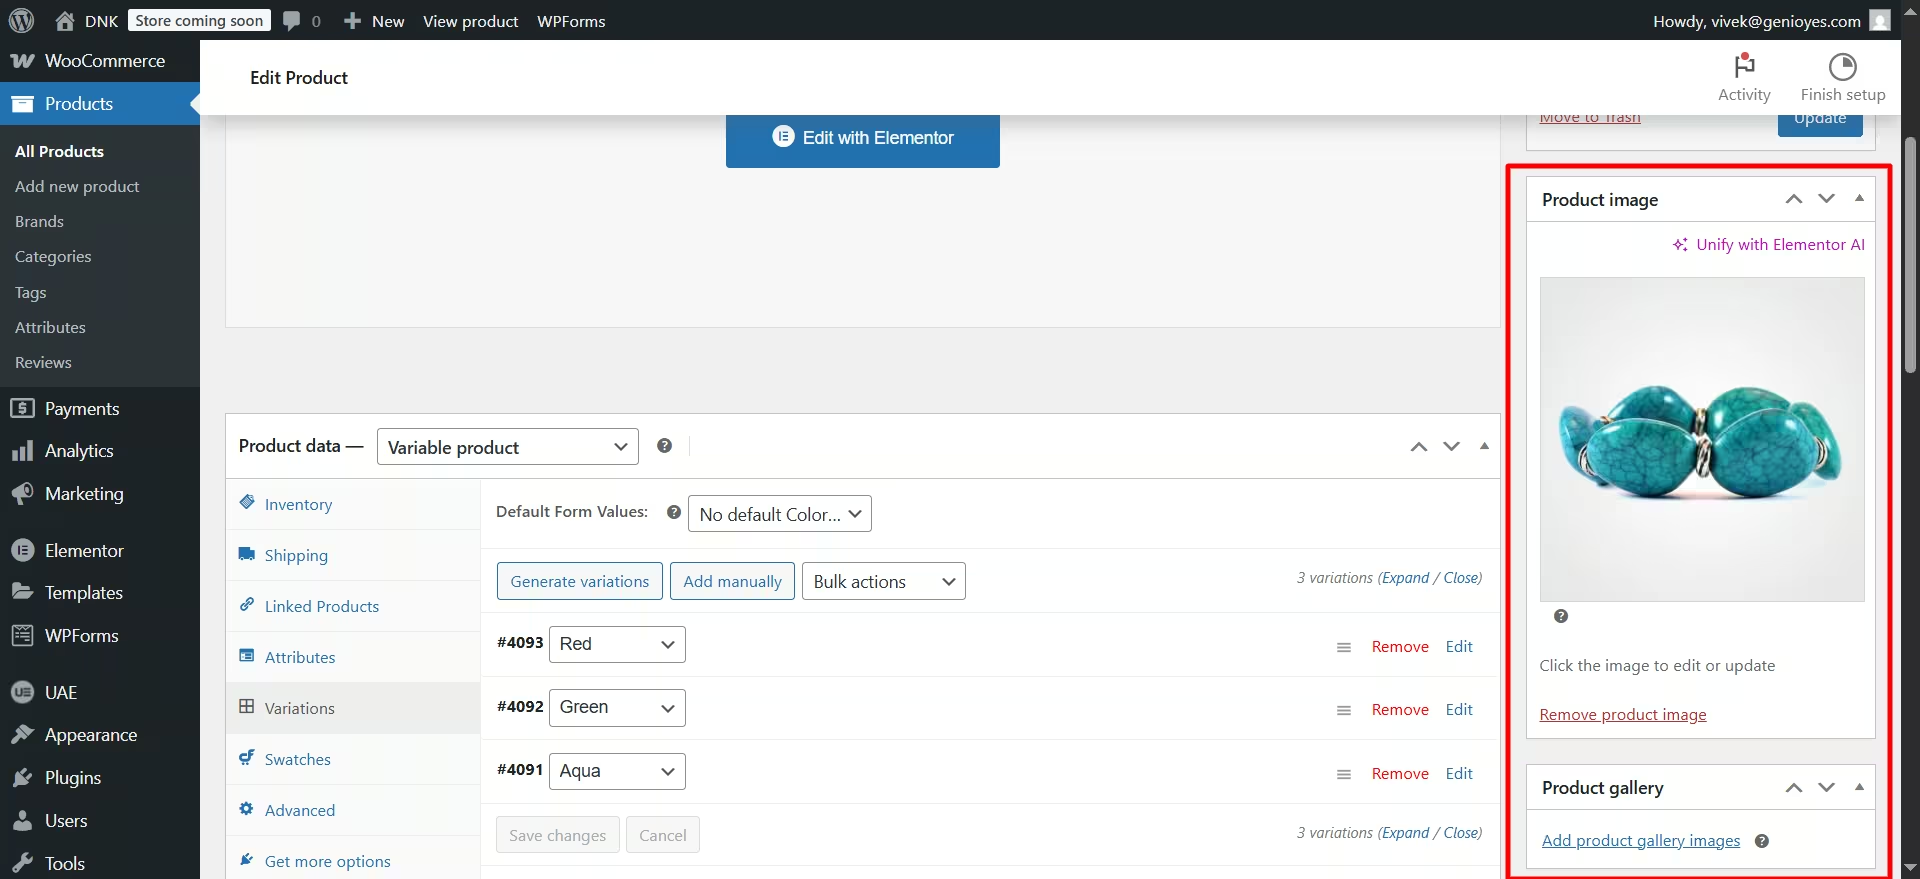
You can add:
- Main product image – the featured image
- Product gallery – multiple images showing the product from different angles
Click Add product gallery images to upload more pictures.
Step 7: Publish Your Product
Once everything looks good:
- Review all product details
- Click the blue Publish button (top right)
Your product is now live and ready to sell!
Bonus Tips for Product Pages
Here are some quick tips to improve your WooCommerce product pages:
- Use clear, well-lit images
- Include sizing guides if you sell clothing
- Write accurate, honest descriptions
- Use keywords naturally in titles and descriptions
- Keep your categories organized for easier navigation
For more best practices, you can also check out WooCommerce’s official documentation
Common Questions
Q: What is the difference between a simple and variable product?
A simple product has no options. A variable product lets customers choose options like size or color.
Q: Can I edit products later?
Yes. Go to Products > All Products and click Edit under any item.
Q: What if I don’t add a price?
WooCommerce won’t let customers add the product to cart without a price.
Want to customize your WordPress dashboard first? Check our guide on how to change your site title and logo in WordPress.
Final Thoughts
Now you know how to add a new product in WooCommerce, whether it’s a simple product or a variable product. Take your time with each step, use high-quality images, and write clear descriptions. With WooCommerce, you can grow your store easily and start selling in no time.